



Buyers & Collectors: Four Signs to Identify Teak Wood
Buyers & Collectors: Four Signs to Identify Teak Wood
Genuine teak reveals itself through four signs working together: straight, coarse grain with visible pores, an oily surface that beads water, a leathery scent when freshly cut or sanded, and a dense, heavy feel in the hand.
One sign alone proves nothing. You need at least two independent cues pointing the same direction before you can call a piece teak with any confidence, and for antiques or finished furniture, sensory tests often fall short entirely, which means expert verification is worth the cost before you commit to a purchase.
Key Features
- Visual inspection of color can be misleading due to weathering; genuine teak maintains golden-yellow to medium-brown hues, with surface oils and pores remaining visible under the patina.
- Confirming teak requires assessing pore structure and grain pattern through end-grain microscopy, especially looking for small, evenly distributed pores and ray lines at 10x to 30x magnification.
- Scent and oily feel are key indicators, with fresh teak emitting a leathery smell and feeling slick to the touch, but these cues fade with age and over finishing layers.
- Be cautious of veneers and stains by checking for visible seams, grain mismatch, and asking direct questions about refinishing, as sensory cues often diminish in antiques or heavily treated pieces.
Table of Contents
Teak Wood Identification Starts with What You See
Before you touch or smell anything, look. Color is the first clue most buyers reach for, and it’s also the one most easily faked or misread. Fresh-cut teak heartwood ranges from golden-yellow to a warmer medium brown, sometimes drifting toward dark chocolate in older or oil-rich boards. Left outdoors, that color shifts fast. Weathered teak turns silvery-gray within months as UV exposure breaks down surface oils, a patina that fools plenty of shoppers into thinking they’ve found a different, lesser wood. Genuine teak (Tectona grandis) actually shows golden-yellow to medium-brown heartwood with straight, occasionally wavy grain, visible pores, and rays, and that combination matters more than color alone.
Grain pattern tells you more than shade does. Teak typically runs straight and coarse, but it can turn wavy or interlocked, especially in carved pieces where the maker worked with the wood’s natural flow rather than against it. Straight grain shows as parallel lines running the length of a board. Interlocked grain shows as a shifting, almost rippled figure that catches light differently depending on the angle you view it from.
Pores and medullary rays are the detail most buyers skip, and it’s the one that separates a confident identification from a guess.
- Look for small, evenly distributed pores across the face grain, visible without magnification on a clean, sanded surface.
- Check the end grain (the cut edge, not the flat face) for the same pores arranged in rows, plus faint ray lines running perpendicular to the grain.
- Compare a suspect sample against a known teak sample, if you have access to one, side by side under the same light.
- Photograph the end grain in close-up under natural light before making any purchase decision remotely.
Weathering complicates all of this. A silvered outdoor teak bench still carries the same internal grain and pore structure. Sand a small hidden patch and the golden-brown color returns immediately, which is itself a useful confirmation test.
Detecting the Oily Feel and Leathery Scent
Teak’s natural oil content distinguishes it from many substitute woods; when rubbed, real teak typically feels waxy or slick rather than dry and porous, a texture resulting from its oil content that contributes to water and rot resistance.
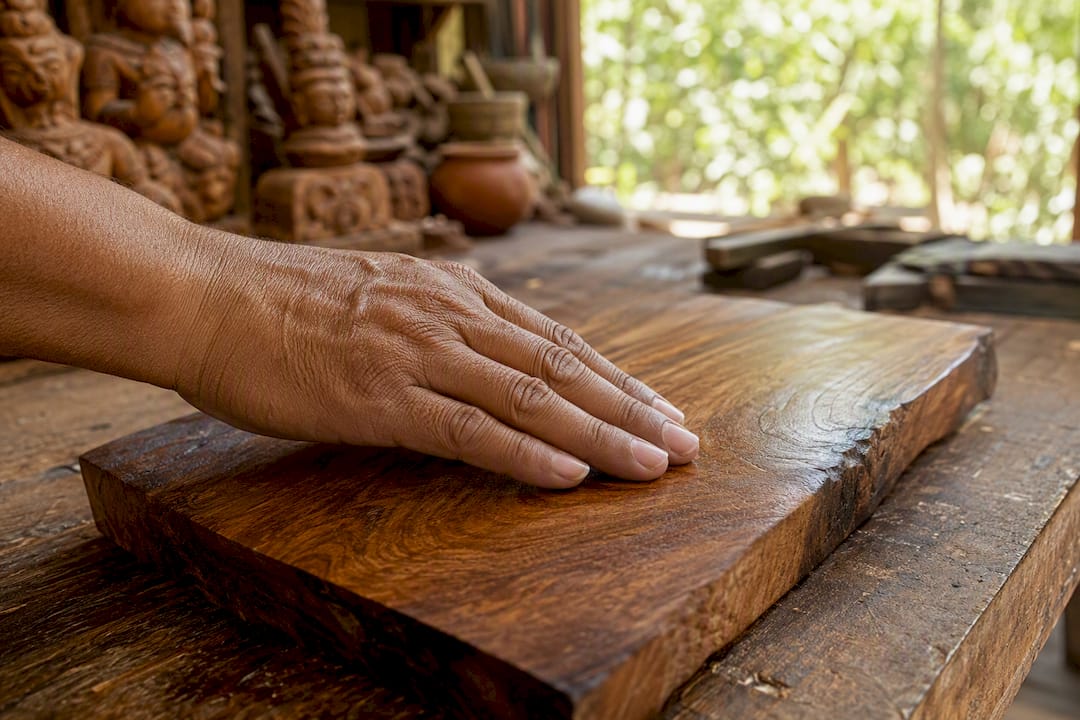
The scent is even more distinctive. Freshly cut or sanded teak gives off a pungent, leathery smell, something closer to old leather or curing tobacco than typical sawdust. On finished furniture, that scent is usually sealed under decades of wax or varnish, so you won’t smell anything standing across the room. A light sanding test on a hidden spot, the underside of a tabletop or the inside of a leg joint, exposes raw wood underneath and releases the scent within seconds.
Weight backs up what your nose and fingers are telling you. Teak isn’t the heaviest tropical hardwood, but it’s noticeably denser than pine, cedar, or most softwood substitutes sold under similar names.
Pro Tip: Keep the numbers in your head before you shop. Teak measures roughly 1,070 lbf on the Janka hardness scale with an average dried weight near 40.9 lb/ft³, which is why a genuine teak stool feels surprisingly heavy for its size compared to a lookalike of the same dimensions.
Scent and oil fade with age, though. A reliable identification routine combines visual checks, the oil and scent test, and a bead-of-water test rather than leaning on any single method, because a 40-year-old teak table that’s been refinished twice may smell like nothing more than the last coat of tung oil applied to it. When scent and feel go quiet, weight and grain become your primary evidence.
What End-Grain Inspection Reveals Under a Loupe
The end grain, the cross-section you see at the cut edge of a board or underneath a table leg, holds more identification value than the face grain most buyers examine. A jeweler’s loupe or a cheap 10x to 30x pocket magnifier turns this into a genuinely reliable test.
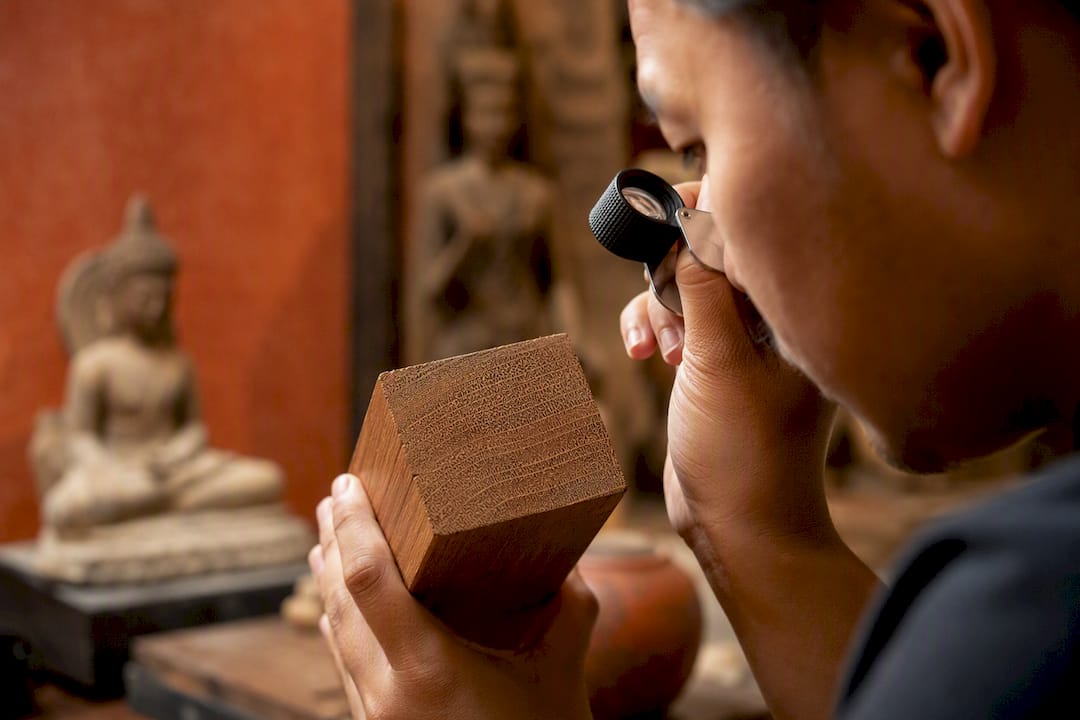
Teak’s end-grain anatomy shows ring-porous to semi-ring-porous vessels, visible rays, and occasional silica deposits, features that show up clearly once you’re looking at 10x magnification or higher. The pores appear as small round or oval openings, arranged in a pattern that shifts slightly between growth rings rather than scattering randomly. Ray lines run perpendicular to those pores, appearing as fine, straight streaks when the end grain is cut cleanly.
Practical steps for checking end grain without damaging a piece:
- Look under table legs, inside drawer joints, or at the underside of a bench seat, spots already cut and rarely finished.
- Wipe the surface clean of dust, then examine it under raking light (a flashlight held at a low angle) before reaching for magnification.
- Use a 10x to 30x loupe to check pore size and ray visibility against reference photos of confirmed teak samples.
- Note whether the silica content dulls a fingernail scrape, since teak’s mineral deposits give it a faintly gritty resistance that soft substitute woods lack.
Distinguishing teak from iroko or afrormosia at this level takes practice, but the pore arrangement in those African species tends to look coarser and less regular. If you’re weighing a high-value piece and the end-grain evidence is ambiguous, that’s the point to stop guessing and send a sample to a wood anatomy lab, where microscopic cross-sectioning settles the question definitively.
Teak Varieties, Grades, and the Substitutes Sold in Their Place
Not all teak looks or performs the same, and the market complicates matters further by selling several unrelated species under the “teak” name. Understanding both helps you avoid overpaying for a lesser grade or a different wood entirely.
Burmese teak, harvested from old-growth forests in Myanmar, carries a reputation for tighter grain, higher oil content, and deeper color than most plantation stock. Indonesian and Indian plantation teak, grown on 20 to 30 year rotation cycles, tends to run paler, less oily, and more variable in grain because the trees simply haven’t had the decades old-growth timber gets to develop density.
Grade matters as much as origin. Grade A teak comes from the outer heartwood, showing the richest color and highest oil content. Grade B and C come from inner heartwood or sapwood-adjacent cuts, appearing paler, drier, and considerably cheaper, often marketed at a fraction of Grade A pricing without the origin or grade disclosed upfront.
Common substitutes worth knowing:
- Cumaru (Brazilian teak): Denser and redder than true teak, lacking the same oily surface feel.
- Rhodesian teak: Unrelated botanically, darker and heavier, sold mostly as flooring.
- Iroko and afrormosia: African species marketed as “African teak,” distinguishable mainly through end-grain anatomy and pore arrangement rather than color alone.
A Step-by-Step Checklist for Inspecting a Piece in Person
Work through these steps in order, and don’t skip ahead just because the first one or two look promising.
- Photograph the whole piece and the end grain in natural light before touching anything.
- Check color and grain pattern across the visible face, noting any patina consistent with weathering versus finish.
- Locate a hidden, unfinished spot (under a leg, inside a joint) and lightly sand an area no larger than a fingertip.
- Smell the sanded spot immediately for the leathery, pungent scent characteristic of raw teak.
- Run a water-bead test on an inconspicuous finished area; oil-rich teak causes water to bead rather than absorb.
- Inspect the end grain with a loupe for pore arrangement and ray lines.
- Weigh the piece mentally against its size, since teak feels denser than most softwood look-alikes.
For casual purchases under a few hundred dollars, two confirming cues are usually enough to proceed. For antiques or high-value pieces, require at least three independent cues, and treat any single failed test as a reason to pause rather than override it with wishful thinking.
Pro Tip: Keep a written log of every test you run, including photos, sanding location, and what you smelled or felt. That documentation becomes essential if you need to dispute a sale later or have a specialist review your findings.
How Sellers Disguise Veneers, Stains, and Cheap Substitutes
Veneer is the most common deception in the teak furniture market, and it’s often invisible until you know where to look. Check edges and corners closely: a veneered piece frequently shows a visible seam line where the thin teak layer meets a plywood or lesser-wood substrate underneath. Grain mismatch between adjoining panels is another giveaway, since real solid teak boards carry continuous grain across a surface while veneer sheets are cut and applied in patches.
Stains present a subtler problem. A reliable identification routine should always include asking the seller directly whether a piece has been stained, since color alone is never definitive proof of species.
- Check corners and undersides for veneer seams or substrate peeking through.
- Compare grain continuity across adjoining panels for mismatches.
- Ask sellers directly whether staining, oiling, or refinishing has been done.
- Avoid solvent or invasive testing on antiques; light visual and photographic checks are safer and preserve value.
Antiques rarely offer clean sensory evidence. Decades of wax, oil treatments, and handling erase scent and surface feel, leaving grain pattern, weight, and documented provenance as the more reliable path forward.
The Low-Cost Tools Worth Keeping in Your Kit
A handful of inexpensive tools cover nearly every identification test described above.
- Jeweler’s loupe (10x to 30x): Reveals pore arrangement and ray lines on end grain.
- Fine sandpaper (220 grit or higher): Exposes raw wood in a hidden spot for scent testing without visible damage.
- A few drops of water: The classic bead test shows oil-rich teak repelling water rather than absorbing it within a minute or two.
- Digital calipers: Useful for comparing board thickness and consistency when veneer is suspected.
On antiques, skip the sanding and solvent tests entirely. Stick to the loupe, water bead, and visual comparison, and note anything ambiguous for a specialist to review later.
Why Antique Statues Often Skip the Sensory Tests Entirely
Carved Asian statues complicate wood identification in ways furniture buyers rarely encounter. Historic carvers didn’t always reach for teak. Antique Buddhist and Hindu sculpture frequently used regionally available woods like camphorwood, poplar, and paulownia instead, chosen for their carving qualities rather than durability. A century-old statue may show none of the oil, scent, or density signals a modern teak buyer expects, simply because it was never teak to begin with.
That’s why HDAsianArt treats wood species as one data point among several, not the deciding factor. Each piece in the collection goes through researched documentation, detailed photography, and provenance review before listing, an approach closer to how museums verify Chinese Buddhist statues than how a furniture retailer grades a dining table. Before buying any carved wooden statue, ask the seller for close-up end-grain photos and whatever provenance documentation exists, since that paper trail often carries more weight than any sanding test ever could.
When to Stop Testing and Call in a Lab
Two or three confirming cues are enough for everyday furniture purchases under a few hundred dollars. For antiques, carved statues, or anything priced as a serious investment, request close-up end-grain photographs, any available provenance documents, and, where feasible, a small sample for lab analysis before you finalize a purchase. Microscopic wood anatomy and chemical analysis settle disputes that visual and sensory tests cannot. Keep every photo, note, and email exchange on file. That record protects you if a sale needs to be contested later.
What Twenty Years in Asian Art Taught Me About Wood Claims
Buyers put too much faith in scent and feel, and I understand why: those tests feel concrete in a way that provenance paperwork doesn’t. But sensory cues are the first thing to disappear on anything old, waxed, or carved from a species nobody bothered to document at the time. The wood itself can mislead you far more easily than a knowledgeable dealer can.
My advice runs counter to most identification guides: treat grain, weight, and end-grain anatomy as your primary evidence, and treat scent as a bonus confirmation rather than a requirement. For carved antiques specifically, stop sanding hidden spots and start asking harder questions about where a piece came from. A seller who can’t produce photographs or history on a “teak” statue is telling you something, whether or not they say it directly.
— James, HDAsianArt.com
Where to Find Authenticated Teak and Wood Statues You Can Trust
Skip the guesswork on species, age, and origin entirely. HDAsianArt sources antique and traditional Buddhist and Hindu statues, including wood pieces from Cambodia, Thailand, Indonesia, and beyond, with each item individually researched and documented before it ever reaches a listing.

Every piece in the collection comes with detailed photography that shows grain, surface condition, and construction details up close, along with provenance information gathered during research rather than assumed from a supplier’s claim. That’s the difference between buying based on a sanding test in your own living room and buying from a source that’s already done the verification work. Browse the current collection of authenticated Asian sculpture or look at a documented piece like this antique Khmer style Banteay Srei deity statue to see how detailed that documentation gets. If you want close-up images of end grain or additional provenance detail on any listing before you buy, HDAsianArt provides that on request, worldwide, with insured DHL shipping included.
Sources
For deeper verification beyond this checklist, the Wood Database’s teak entry covers detailed anatomical reference photos, and the Philadelphia Museum of Art’s wood identification study shows how conservators approach species analysis on carved antiques. Collectors researching related materials may also find this piece on how wood species affect vintage guitar value a useful parallel case.
- Teak | The Wood Database (via woodassistant mirror)
- How To Tell Teak Wood: Essential Proven Guide
- Teak | The Wood Database
- How to Identify Teak Wood: 6 steps (wikiHow)
- Wood identification of Chinese Buddhist statues in the Philadelphia Museum of Art
